The BestDessert recipes

Table of Contents
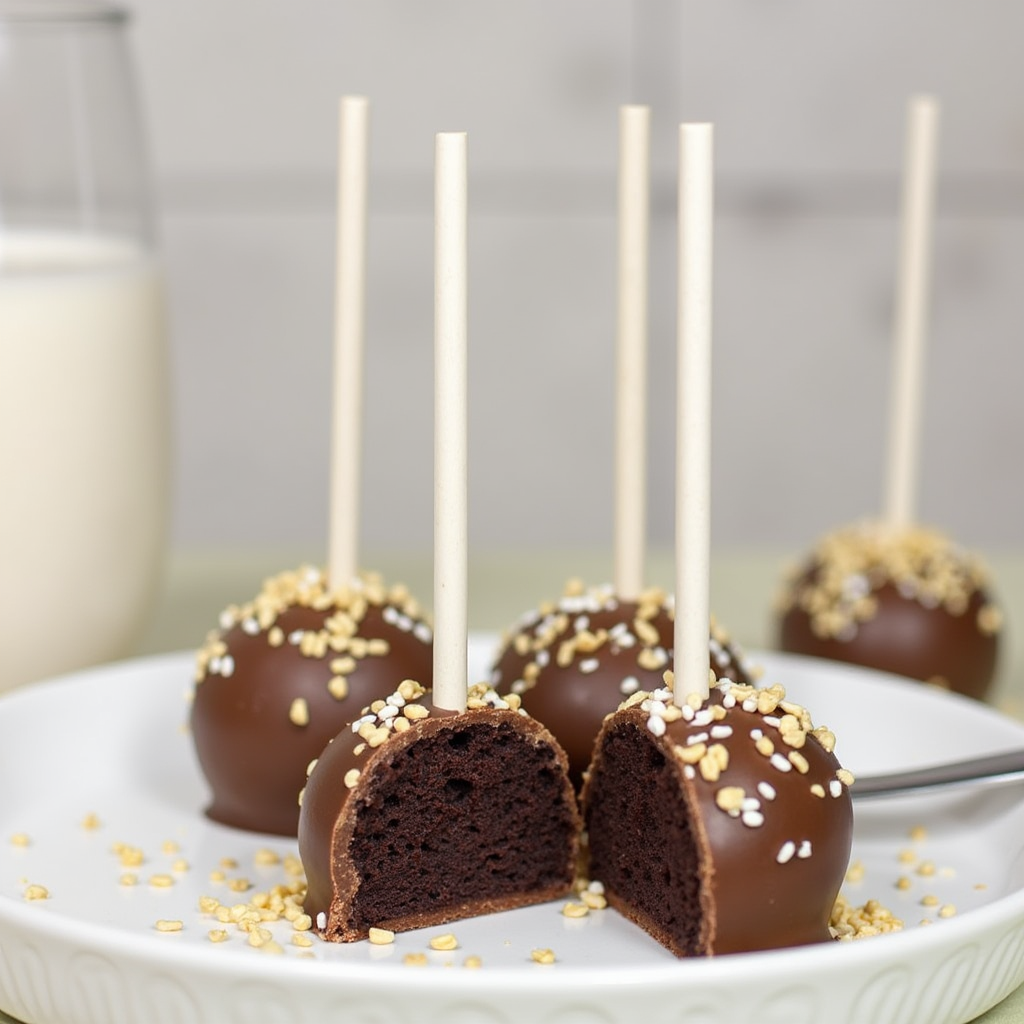
Every time I walk into Starbucks, those adorable chocolate cake pops call my name. They’re not just a treat – they’re a miniature celebration of chocolate that fits perfectly in your hand. Now, imagine creating these delightful bites right in your own kitchen with this homemade cake pop recipe.
Crafting a Starbucks chocolate cake pop recipe at home isn’t just about saving money. It’s about experiencing the joy of baking and sharing something truly special with your loved ones. Whether you’re a baking novice or a seasoned pro, this recipe will guide you through creating these irresistible bite-sized delights.
With just 30 minutes of prep time and 30 minutes of cooking, you’ll transform simple ingredients into 12 delectable cake pops. Each pop comes in at a modest 170 calories, making them a guilt-free indulgence that captures the essence of Starbucks’ beloved treat.
Get ready to unlock the secrets of making the perfect homemade cake pop that rivals any coffee shop creation. Your kitchen is about to become the new neighborhood bakery!
Introduction to Starbucks-Style Chocolate Cake Pops
Explore the world of diy cake pops, where creativity meets delicious baking! Making your own Starbucks cake pop at home is more than a culinary adventure. It’s a chance to turn a simple dessert into a personalized masterpiece.
Why Make Homemade Cake Pops
Creating starbucks cake pops in your kitchen has many benefits. It’s not just about saving money. Homemade treats offer:
- Complete control over ingredients
- Customizable flavor combinations
- Fun baking experience
- Perfect for special occasions
Cost Savings vs. Store-Bought
Making your own cake pops saves a lot of money. A single Starbucks cake pop costs $3 to $4. But, you can make your own for a fraction of that price.
| Expense Category | Starbucks Price | Homemade Cost |
|---|---|---|
| Single Cake Pop | $3.50 | $0.75 |
| Batch of 24 Cake Pops | $84 | $18 |
Overview of the Recipe
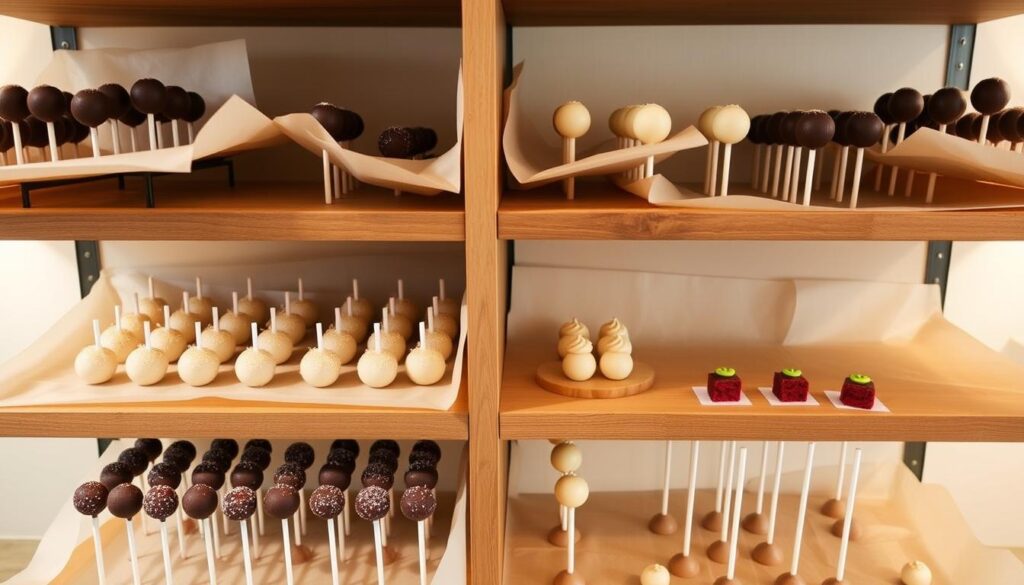
Your diy cake pops journey includes several steps. You’ll bake a chocolate cake base, make buttercream frosting, form cake balls, coat them in chocolate, and decorate. The whole process takes about 1 hour and 20 minutes. You’ll end up with 24 delicious treats.
Nutrition-conscious bakers will find each cake pop has about 119 calories. This makes them a delightful yet moderate indulgence.
Essential Ingredients for Chocolate Cake Base
Making the perfect chocolate cake pop starts with choosing the right ingredients. Your easy cake pop recipe needs a few basic items from your pantry. These items turn into a delicious treat. The base of any great chocolate cake pop is a moist, rich chocolate cake.
Here are the key ingredients you’ll need for your chocolate cake pop recipe:
- All-purpose flour: The structural backbone of your cake
- Granulated sugar: Provides sweetness and helps with texture
- Unsweetened cocoa powder: Delivers deep chocolate flavor
- Baking soda: Helps the cake rise and become light
- Salt: Enhances overall flavor profile
- Vegetable oil: Keeps the cake moist
- Eggs: Bind ingredients and add richness
- Vanilla extract: Adds depth to the chocolate flavor
- Hot water: Activates cocoa and creates a smooth batter
When making your chocolate cake pop, the quality of ingredients is key. Choose fresh, high-quality ingredients to make your homemade treats as good as Starbucks’. Each ingredient is important for a delicious chocolate cake pop that will wow your family and friends.
Your chocolate cake pop journey starts with these basic ingredients. By knowing their role and picking the best ones, you’ll make a dessert that everyone will enjoy.
Required Tools and Equipment
Making cake pops needs specific tools for success. Having the right equipment makes your cake pop tutorial easier. Let’s look at the essential tools for these tasty treats.
Baking Essentials
Get your kitchen ready with these baking tools for your cake pop recipe:
- 9×13 inch baking dish
- Large mixing bowl
- Hand mixer or stand mixer
- Measuring cups and spoons
- Cookie scoop or small ice cream scoop
- Cooling rack
- Parchment paper
Decorating Tools
Make your cake pops look amazing with these decorating tools:
- Candy melting pot or microwave-safe bowl
- Cake pop sticks (48 recommended)
- Cake pop stand or styrofoam block
- Offset spatula
- Sprinkles and decorative toppings
- Piping bags (optional)
Storage Solutions
Keep your cake pops fresh with these storage tools:
- Airtight container
- Plastic wrap
- Refrigerator or freezer space
Pro tip for your cake pop tutorial: Get a dedicated cake pop stand. It makes decorating easier and prevents smudges. With these tools, you can make professional-looking cake pops at home!
Starbucks Chocolate Cake Pop Recipe
Make your own Starbucks-style chocolate cake pops at home! This recipe is easy to follow and uses simple ingredients. It brings the coffee shop favorite right to your kitchen.
These homemade treats are a cost-effective delight. They cost about $0.50 each, compared to Starbucks’ $3.00 per pop.
Ingredients List
- 1 box chocolate cake mix
- 3 large eggs
- 1/3 cup vegetable oil
- 1 cup milk
- 1 cup chocolate buttercream frosting
- Chocolate candy melts for coating
- 40 cake pop sticks
Nutritional Information
| Nutrient | Amount per Cake Pop |
|---|---|
| Calories | 182 kcal |
| Total Carbohydrates | 21 g |
| Protein | 2 g |
| Total Fat | 10 g |
| Sugar | 14 g |
When making your starbucks copycat recipe, chill the cake balls for 2-4 hours. This keeps them firm while you coat them.
Storage Tips
- Refrigerator storage: Up to 5 days in an airtight container
- Freezer storage: Up to 1 month
- Recommended baking temperature: 350°F
Impress your loved ones with these tasty homemade chocolate cake pops. They’re just as good as the Starbucks version!
Making the Perfect Chocolate Cake Base
Starting a delicious homemade cake pop recipe begins with a great chocolate cake base. Getting this right is crucial for your easy cake pop recipe. Baking requires precision and care.
To make the perfect chocolate cake base, pay close attention to detail. Make sure your ingredients are at room temperature and measured correctly. This ensures a moist and tasty base for your cake pops.
Essential Mixing Techniques
Here are the key steps for mixing your cake batter:
- Sift dry ingredients to remove lumps
- Cream butter and sugar until light and fluffy
- Add eggs one at a time, mixing thoroughly
- Alternate wet and dry ingredients gently
- Avoid overmixing to prevent a tough cake
Baking Precision
Temperature and timing are key in your homemade cake pop recipe. Preheat your oven to exactly 350°F (180°C) for the best results.
| Baking Parameter | Recommended Setting |
|---|---|
| Oven Temperature | 350°F (180°C) |
| Baking Time | 25-27 minutes |
| Pan Size | 9-inch round cake pan |
Cooling Process
Let your cake cool completely before crumbling. Patience is key in this easy cake pop recipe. Place the cake on a wire rack for about 1 hour at room temperature.
Pro tip: Refrigerating the cake for 2-4 hours before crumbling makes it easier to handle. It also helps create more uniform cake balls. Your homemade cake pop recipe will thank you for this extra step!
Preparing the Chocolate Buttercream Frosting
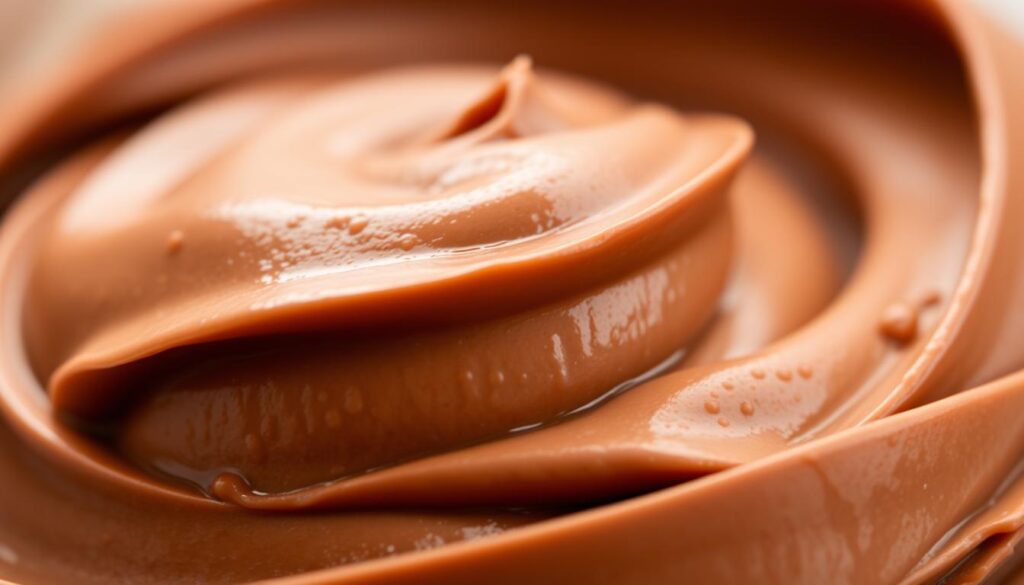
Making the perfect chocolate buttercream frosting is key to great cake pops. Your homemade frosting holds the cake crumbs together. It also adds a rich, creamy flavor to your chocolate cake pop recipe.
To create an amazing chocolate buttercream, you’ll need a few ingredients:
- 1/4 cup unsalted butter, softened
- 1 cup powdered sugar
- 2 tablespoons cocoa powder
- 1 tablespoon whole milk
- 1/2 teaspoon vanilla extract
Begin by creaming the softened butter until it’s smooth and fluffy. Gradually add powdered sugar, mixing well to avoid lumps. Add the cocoa powder for a deep chocolate taste. Then, slowly mix in the milk and vanilla, adjusting the consistency as needed.
The secret to a perfect frosting is getting the right texture. Your frosting should be thick enough to hold cake crumbs together but not too stiff. If it’s too dry, add a bit more milk. For a stronger chocolate taste, add a bit more cocoa powder.
“The right frosting can transform good cake pops into an extraordinary treat!” – Baking Enthusiast
Pro tip: Taste your frosting and adjust the sweetness to your liking. Some bakers add a pinch of salt to balance the sweetness in their delicious cake pop recipe.
Forming and Shaping the Cake Balls
Making perfectly shaped cake balls is key in your diy cake pops journey. It’s all about consistent sizes and the right rolling techniques. These will make your homemade treats look like they were made by a pro.
In this cake pop tutorial, you’ll learn to turn cake crumbs into tasty, bite-sized spheres. They’ll look great and taste even better.
Size Guidelines for Perfect Cake Pops
When making your cake balls, aim for a consistent size. This ensures even cooking and a nice look. Here’s what to do:
- Weigh each cake ball at about 27-30 grams
- Go for a diameter of 1-1/4 inches (3 cm)
- Use a small cookie scoop or kitchen scale for accuracy
Rolling Techniques
Getting the rolling technique right is crucial for smooth, round cake pops. Here are some tips from the pros:
- Make sure the cake mixture is completely cool before shaping
- Use gentle, consistent pressure when rolling
- Keep your hands slightly damp to prevent sticking
- Roll in a circular motion between your palms
Chilling Instructions
Chilling is key for the cake balls’ structure and easier coating. Here’s how to chill them right:
- Freeze uncovered for 15 minutes
- Refrigerate uncovered for 30 minutes
- Make sure they’re firm but not too hard
By using these diy cake pops techniques, you’ll make treats that look like they were made by a pro. They’re sure to impress!
Chocolate Coating Process
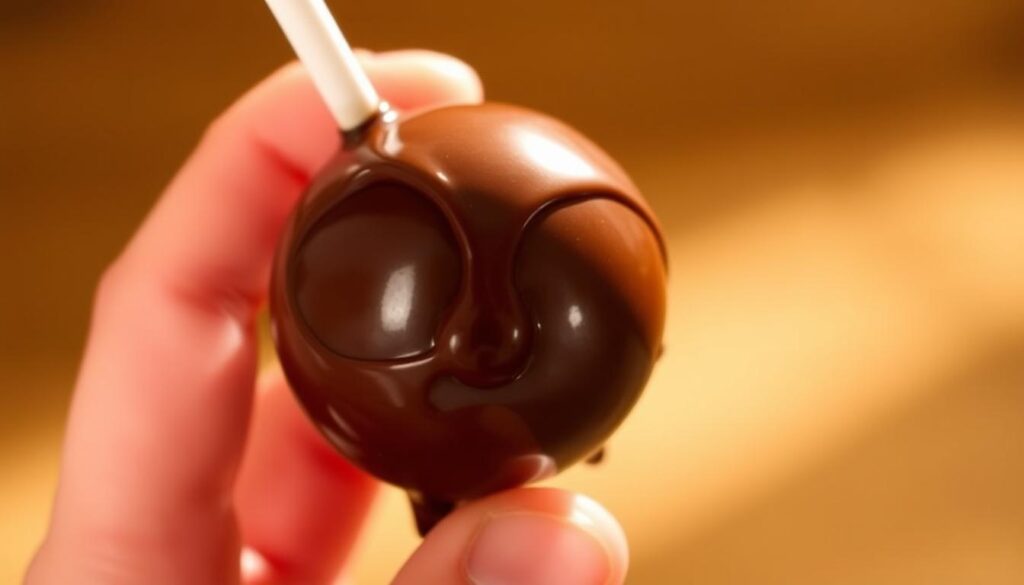
To make the perfect chocolate cake pop, you need to master the coating technique. Your homemade Starbucks cake pop will look amazing with a smooth, chocolate exterior. It will be just like the ones from the coffee chain.
First, prepare your chocolate coating. For the best results, use high-quality candy melts. Melt them carefully to get the right consistency:
- Use microwave-safe bowls for melting
- Heat in 20-30 second increments
- Stir between each heating cycle
- Add 1-2 teaspoons of shortening for smooth texture
The dipping process is key for a professional look. Follow these steps:
- Make sure cake balls are chilled (20 minutes in refrigerator)
- Dip cake pop stick into melted chocolate before inserting into cake ball
- Hold cake pop at a 45-degree angle when dipping
- Gently tap to remove excess chocolate coating
- Add sprinkles before coating sets completely
Pro tip: Work fast when coating to avoid chocolate hardening. The best coating temperature is between 90-95°F. This gives a smooth, glossy finish, just like Starbucks.
Your total coating time should be about 20-30 minutes. Each cake pop takes 1-2 minutes to coat and decorate. This method makes a delicious, professional-looking treat that will wow everyone.
Decorating Tips and Techniques
Turning your starbucks copycat recipe into a work of art needs creativity and care. Decorating cake pops lets you show off your skills and make each one special.
With the right techniques, your DIY cake pops can look amazing. The trick is to work fast and with confidence when the candy coating is still wet.
Sprinkle Application Strategies
Sprinkles can turn simple cake pops into stunning treats. Here are some expert tips:
- Put sprinkles on right after dipping, when the chocolate is still wet
- Use different sizes of sprinkles for a fun look
- Turn the cake pop to spread sprinkles evenly
- Tap gently to get rid of extra sprinkles
Creative Design Variations
Make your starbucks copycat recipe stand out with these ideas:
- Drizzle different chocolate colors
- Make decorations for holidays
- Add edible glitter for shine
- Try color-blocking for a unique look
| Decoration Style | Difficulty Level | Visual Impact |
|---|---|---|
| Classic Sprinkles | Easy | Medium |
| Chocolate Drizzle | Moderate | High |
| Themed Designs | Advanced | Very High |
Put your decorated cake pops in a styrofoam block or cardboard box with holes to dry. This helps your designs set perfectly.
“Decorating cake pops is an art form that allows you to express creativity with every bite!” – Baking Enthusiast
Practice is key. Don’t hesitate to try new things and find your own style with these DIY cake pops techniques.
Storage and Shelf Life
Keeping your homemade cake pops fresh is all about smart storage. With the right methods, your cake pops can stay delicious for a long time.
Storing them at room temperature is the easiest way. In an airtight container, they can last up to 3-7 days. Make sure the container is sealed well to keep moisture out and protect them from germs.
Storage Options and Shelf Life
- Room Temperature: 3-7 days in sealed container
- Refrigeration: Up to 2 weeks
- Freezer Storage: Up to 3 months
For longer storage, the fridge is a great choice. Wrap each cake pop in plastic wrap first, then put them in a sealed container. This keeps them moist and prevents freezer burn.
Freezing is the best way to keep them for a long time. Here’s how to do it right:
- Wrap each cake pop in plastic wrap
- Put them in a single layer in an airtight container
- Mark the container with the date you made them
- Let them thaw at room temperature for 1-3 hours before eating
Tip: Let frozen cake pops thaw slowly to keep their texture and avoid moisture buildup.
Remember, proper storage is key to enjoying your homemade cake pops at their absolute best!
Conclusion
Making a delicious cake pop recipe at home is very rewarding. Your Starbucks chocolate cake pop recipe lets you make treats like a pro without spending a lot. You’ll get better at mixing, baking, and decorating these small desserts with practice.
This recipe is great because you can try new things. You can change the cake flavor, decorations, and coatings. Each batch makes 20-24 cake pops, perfect for parties, gifts, or just for fun.
Getting good at making cake pops takes time. Start by following the recipe carefully. Don’t worry if your first ones aren’t perfect. The fun is in making something special with your own hands. Keep trying, and you’ll soon make cake pops that look like they came from Starbucks.
We encourage you to share your cake pop creations and stories. Your special take on this recipe might inspire others to try making homemade desserts.
FAQ
How long do homemade cake pops stay fresh?
Homemade cake pops can last 3-4 days at room temperature. They stay fresh up to a week in the fridge. Or, they can last 2 months when frozen.
Can I make cake pops without a cake pop maker?
Yes, you can make cake pops without a special maker. Bake a cake, crumble it, mix with frosting, shape into balls, and coat on sticks. This recipe is similar to Starbucks-style.
What’s the best chocolate for coating cake pops?
Candy melts or high-quality chocolate wafers are best for coating. They give a smooth finish and come in many colors. Choose dark, milk, or white chocolate based on your taste.
How do I prevent cake pops from falling off the stick?
Chill your cake balls before dipping. Dip the stick in melted chocolate before inserting it into the cake ball. This makes them stick better and prevents sliding.
Can I make cake pops ahead of time?
Yes! Cake pops are perfect for making ahead. You can make them 2-3 days before an event. Store them in the fridge or freeze for up to two months.
Are cake pops difficult to make for beginners?
Cake pops are not hard to make, but they do need some practice. Start with simple decorations and techniques. This will help you build confidence.
Can I use a different flavor instead of chocolate?
Definitely! You can change the flavor by using different cake and frosting. Try vanilla, red velvet, or other flavors to make unique cake pops.
What equipment do I absolutely need to make cake pops?
You’ll need a mixing bowl, baking pan, mixer, lollipop sticks, and a melting pot or microwave-safe bowl for chocolate. Also, a styrofoam block or cake pop stand for drying.
How do I get a smooth chocolate coating?
Melt your chocolate to the right consistency. Tap off excess chocolate gently. Keep the chocolate at a steady temperature and work fast for a smooth finish.
Are homemade cake pops cheaper than store-bought?
Yes, making cake pops at home is much cheaper. You can make 24-30 cake pops for about the same price as 6-8 from Starbucks.


