Table of Contents
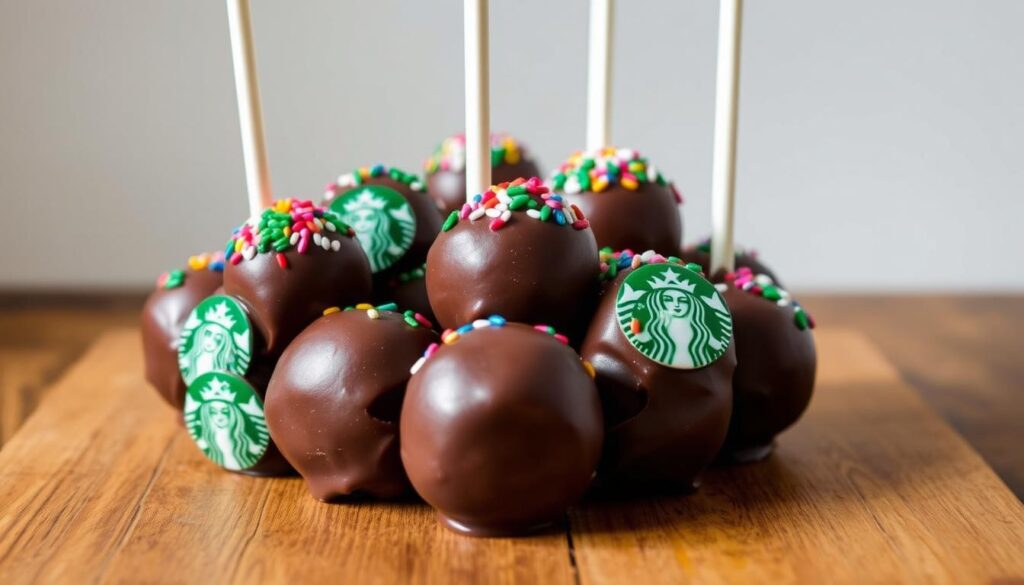
Ever wanted to enjoy Starbucks cake pops but thought they were too pricey? You’re not alone. Making your own Starbucks cake pops at home is easy and saves money.
These treats have won over many dessert fans. Our recipe lets you make these tasty bites in your kitchen. You’ll save up to 70% and enjoy cake pops just how you like them.
Perfect for birthdays, casual gatherings, or just treating yourself, homemade Starbucks cake pops are ideal. This guide will show you how to make these treats. You’ll get professional-looking results that match the coffee chain’s famous dessert.
Ready to wow your loved ones with delicious, affordable cake pops? Your baking journey begins today!
Why These Homemade Starbucks Cake Pops Are Perfect
Making easy Starbucks cake pops at home turns a simple dessert into a special treat. These treats are great for home bakers and dessert lovers. They offer many benefits.
Cost-Effective Alternative
Creating the best Starbucks cake pops at home saves you a lot of money. Here are some financial perks:
- Retail price at Starbucks: Over $2 per cake pop
- Homemade cost: Approximately $0.50 per pop
- One batch yields 24-28 cake pops
With a little time and effort, you can make a batch of tasty cake pops for much less than the coffee shop price.
Customizable Options
Homemade cake pops let you be creative. You can try:
- Flavor combinations
- Color schemes
- Decorative designs
- Seasonal themes
Your kitchen becomes a playground for culinary imagination!
Perfect for Special Occasions
Homemade cake pops are great for any special event. They’re perfect for birthdays, baby showers, or holidays. They’re easy to carry, cute, and can fit any event’s theme.
| Occasion | Suggested Decoration |
|---|---|
| Birthday | Colorful sprinkles |
| Wedding | Elegant white coating |
| Holiday | Themed candy melts |
With these easy Starbucks cake pops, you’ll make desserts that everyone will love. And you’ll save money too.
Essential Ingredients for Starbucks Cake Pops Recipe
To make delicious Starbucks-style cake pops at home, start by gathering the right ingredients. Your homemade recipe will need a few key items for top-notch results.
Here are the main ingredients for your cake pop journey:
- Cake Mix: 1 box of white cake mix (about 15.25 oz)
- Frosting: ½ cup of vanilla frosting
- Candy Melts: 12 ounces of white or colored coating
- Lollipop Sticks: 48 standard-sized sticks
- Additional Flavor Enhancers: Vanilla extract, almond extract
When picking ingredients for your starbucks cake pops recipe, quality is crucial. Go for a trusted cake mix brand and choose fresh, creamy frosting. The candy melts will give your cake pops that smooth coating everyone loves.
Pro tip: For the best taste, use whole milk and add a bit of vanilla extract to your cake mix. This small addition can make your homemade cake pops truly irresistible.
| Ingredient | Quantity | Purpose |
|---|---|---|
| White Cake Mix | 1 box | Base for cake pops |
| Vanilla Frosting | 4 tablespoons | Binding agent |
| Candy Melts | 16 ounces | Coating |
Remember, precision is key when gathering your starbucks cake pops ingredients. Measure carefully and get ready to make a treat that’s just as good as the coffee shop version!
Required Tools and Equipment
To make delicious Starbucks cake pops at home, you need certain tools. This guide will show you what you need to make these tasty treats like a pro.
Baking Essentials
For baking Starbucks cake pops, you’ll need some basic tools:
- 9×13 inch baking pan
- Large mixing bowls
- Electric mixer or whisk
- Measuring cups and spoons
- Cooling rack
Decorating Tools
To decorate your cake pops like Starbucks, you’ll need:
- Cake pop sticks (6-inch recommended)
- Styrofoam block for drying
- Candy melting wafers
- Piping bags
- Offset spatula
Storage Equipment
Keeping your cake pops fresh is important:
| Storage Method | Duration | Recommended Container |
|---|---|---|
| Refrigerator | Up to 5 days | Airtight container |
| Freezer | Up to 1 month | Sealed plastic bag |
Pro tip: Good tools make baking easier and more fun. With the right tools, your cake pops will look like they came from Starbucks.
Step-by-Step Preparation Guide
Making Starbucks-style cake pops at home is simple. This guide will show you how to make these tasty treats with ease.
- Bake the Cake Base First, preheat your oven to 350°F. Mix 1 cup all-purpose flour, 1 cup granulated sugar, and 6 tablespoons cocoa powder. Bake for 25-28 minutes until a toothpick comes out clean.
- Crumble and Mix After the cake cools, crumble it finely. Add 1/2 cup buttercream frosting and mix until it forms balls. Use a cookie scoop for even sizes.
- Form Cake Balls Roll the mix into 1-1/2 inch balls. You should get 24-25 balls. Place them on a parchment-lined baking sheet.
- Chill and Prepare Refrigerate the balls for 20-30 minutes. This makes them firm for dipping. Freezing them for an hour helps too.
- Dip and Decorate Melt candy coating or white chocolate. Dip cake pop sticks halfway and then into the cake balls. Coat each pop fully and decorate with sprinkles or drizzle.
“The secret to perfect starbucks cake pops is patience and precision in each step.” – Baking Enthusiast
By following these steps, you can make professional-looking cake pops at home. Each homemade pop costs about $0.35, saving you 91% compared to Starbucks’ $3.75 price.
Mastering the Perfect Cake Base
Making the best Starbucks cake pops at home starts with a great cake base. You need the right texture and moisture. A perfectly baked cake is key. It should crumble easily and stick well with frosting.
Perfecting Your Baking Temperature
Temperature control is crucial when making homemade Starbucks cake pops. Bake your cake at 325°F (175°C) for the best results. This temperature ensures even cooking and keeps the cake moist.
Your cake will bake for 23-28 minutes. Make sure to check it often to avoid overcooking.
- Use an oven thermometer to verify accurate temperature
- Place cake in the center rack for consistent heat distribution
- Avoid opening the oven door frequently during baking
Moisture Control Techniques
For the best Starbucks cake pops, you need to control moisture. Add 1 cup of water and ⅓ cup of coconut oil to your mix. These ingredients make the cake moist but not soggy.
The Cooling Process
Cooling your cake properly is vital. Let it cool completely at room temperature for about 15 minutes. This step helps prevent moisture buildup and makes crumbling easier.
Pro Tip: A perfectly cooled cake is the foundation of delicious homemade Starbucks cake pops!
Creating the Ideal Cake Pop Mixture

Making the perfect starbucks cake pops recipe is all about finding the right mix of cake and frosting. Your easy starbucks cake pops need a mix that’s just right. It should stick together well but not be too dry or too wet.
Here are the main tips for making your cake pop mix:
- Use a 3:1 cake to frosting ratio
- Crumble cake completely into fine crumbs
- Add frosting gradually
- Mix until the texture is similar to play-dough
The mix’s texture is key for great cake pops. Too much frosting makes them too soft, and too little causes them to crumble. You should be able to press the mix together without it being sticky.
| Mixture Component | Recommended Quantity |
|---|---|
| Crumbled Cake | 3 cups |
| Frosting | 1 cup |
| Ideal Mixture Weight | 27-30 grams per cake pop |
Pro tip: If your mix feels dry, add frosting a little at a time. If it’s too wet, add more cake crumbs to get it just right.
Dipping and Coating Techniques
Learning to dip and coat is key in your Starbucks cake pops tutorial. The right method can make your homemade treats look like they were made by a pro.
When you follow a step-by-step guide, controlling the temperature is crucial. Candy melts should be heated to 100-110°F. This temperature makes the coating smooth and perfect for covering your cake balls.
Coating Consistency Secrets
Getting the coating just right takes focus. Here are some tips for a pro finish:
- Use high-quality candy melts for the best results
- Thin out thick candy melts with vegetable shortening
- Gently tap off excess coating to prevent dripping
- Work quickly to prevent the coating from hardening
Dipping Techniques
Professional cake pop makers know technique is everything. Dip your cake pop stick into melted candy coating before inserting it into the cake ball. This makes sure it stays on during the coating process.
When dipping, dip the cake pop at a 45-degree angle and lift straight up. Rotate the pop to let excess coating drip off. Let each cake pop set for about 1 hour before decorating.
Pro tip: Keep your candy melts warm using a heating pad or double boiler to maintain optimal coating consistency.
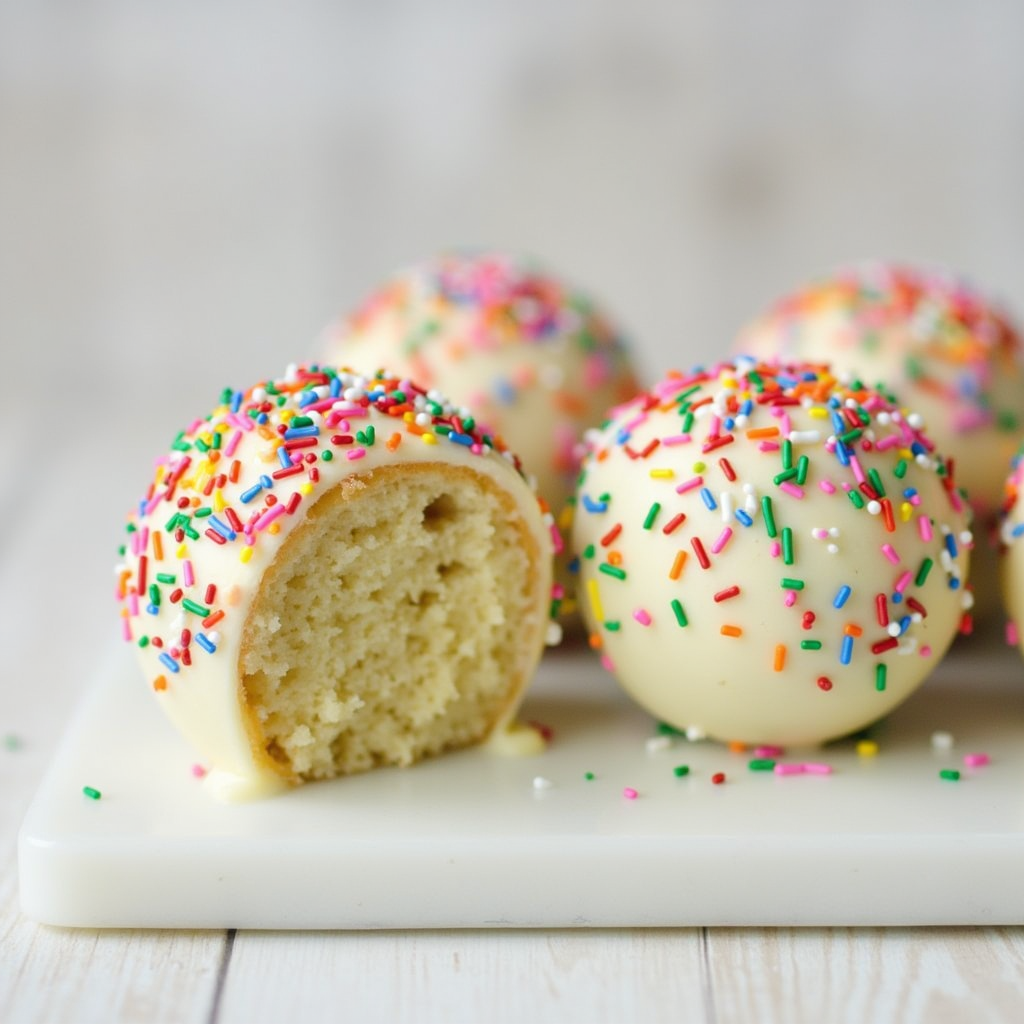
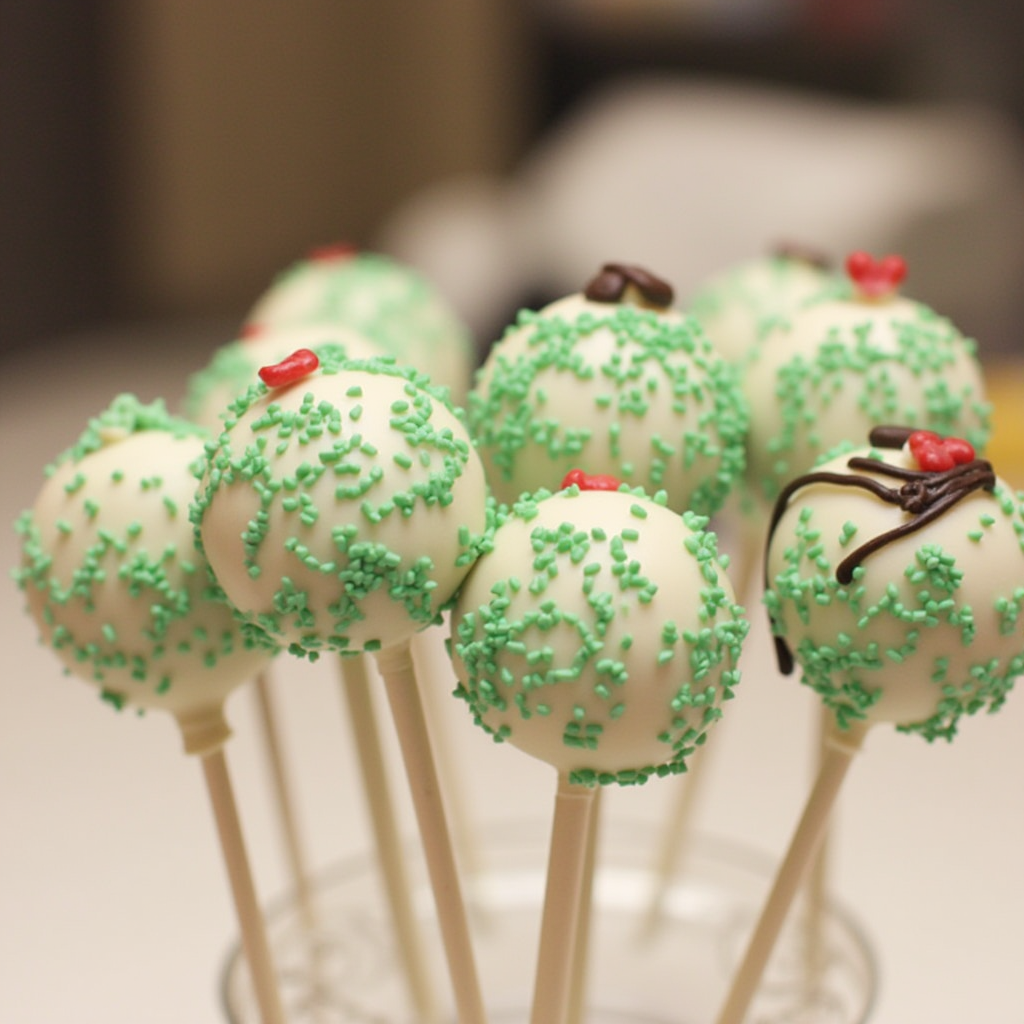
Decorating Ideas and Variations
Turning your homemade Starbucks cake pops into stunning treats is an art. It lets you explore a world of colors, textures, and flavors. You can make them just as good as the ones from the coffee shop.
When making starbucks cake pops flavors, try these exciting decoration techniques:
- Classic Drizzle Patterns: Create elegant lines using melted chocolate in contrasting colors
- Sprinkle Varieties: Use themed or seasonal sprinkles for festive touches
- Color-Blocking: Experiment with multiple candy coating colors
- Metallic Accents: Add edible gold or silver dust for glamorous finishes
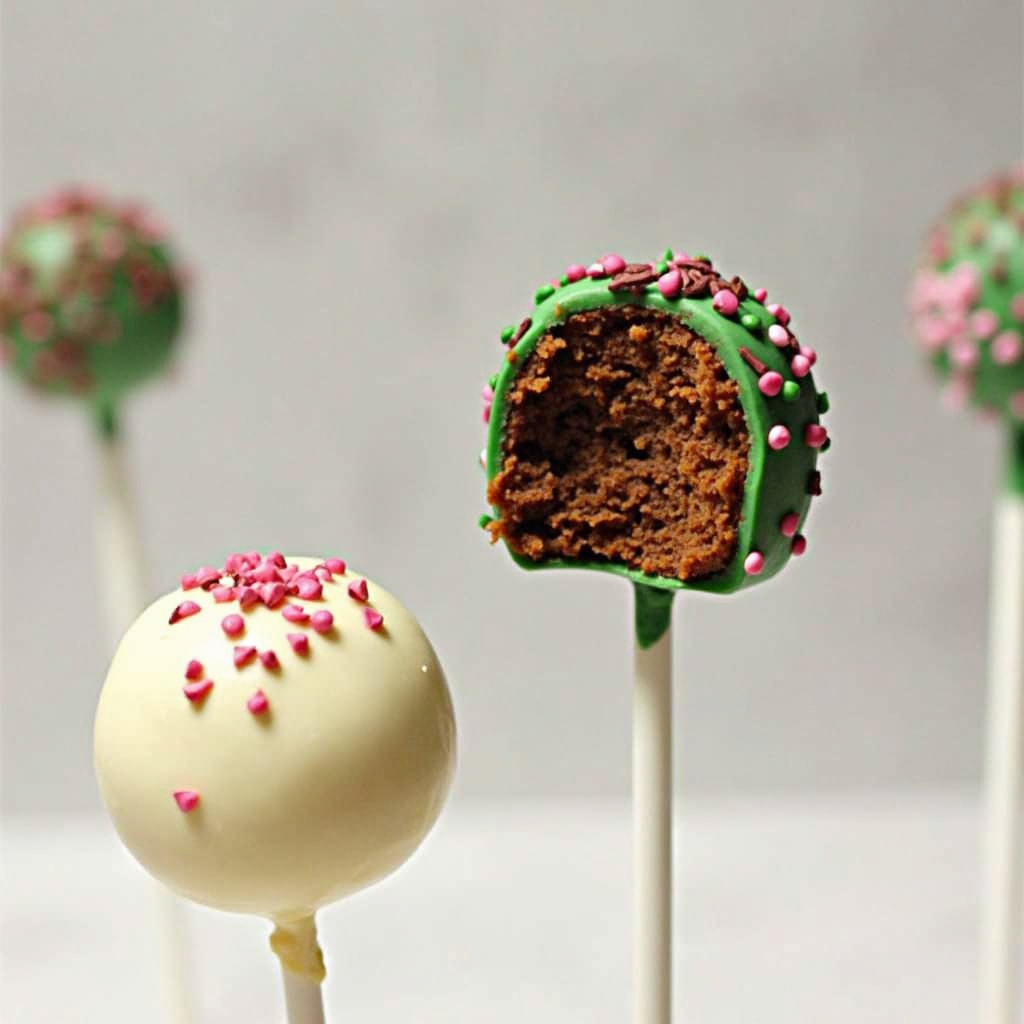
Your homemade Starbucks cake pops can have amazing flavor variations. Popular options include:
- Red Velvet with Cream Cheese Coating
- Chocolate Brownie with Dark Chocolate Drizzle
- Lemon Cake with White Chocolate Glaze
- Vanilla Bean with Pastel Pink Coating
Remember, temperature control is key when decorating. Make sure your chocolate coating is smooth and at the right temperature. This way, you’ll make cake pops that taste great and look like they were made by a pro.
Pro Tip: Chill your cake balls for 30 minutes before dipping to ensure a smooth, even coating.
Storage and Shelf Life
Making the best Starbucks cake pops at home is just the start. Learning how to store them right keeps them fresh and tasty longer. Storing them well is key to keeping their quality and flavor.
There are different ways to store your homemade cake pops. Each method has its own tips:
Room Temperature Storage
Cake pops can stay fresh for up to a week at room temperature. Store them in an airtight container, away from sunlight and heat. Use paper towels between layers to avoid moisture.
Refrigeration Guidelines
Refrigeration can make your cake pops last longer. Here’s how to do it right:
- Use a glass container to avoid flavor absorption
- Keep them on a cool, consistent shelf in the fridge
- They can stay fresh for up to two weeks
Freezing Instructions
Freezing is the best way to keep your cake pops fresh for a long time:
| Freezing Method | Duration | Preparation |
|---|---|---|
| Standard Freezing | Up to 1 month | Wrap individually in wax paper |
| Airtight Container | Up to 1 month | Use sealed freezer bag |
Pro tip: Wrap each cake pop separately to avoid freezer burn. Store them in an airtight container.
Popular Flavor Combinations
Exploring starbucks cake pops flavors opens a world of sweet delights. Each flavor is a unique and memorable mix that makes every bite special.
Here are some irresistible starbucks cake pops recipe favorites:
- Classic Chocolate: A rich, decadent option loved by chocolate enthusiasts
- Birthday Cake: Festive pastel pink with sprinkle decorations
- Red Velvet: Smooth, velvety texture with cream cheese undertones
- Seasonal Specials: Peppermint and pumpkin spice variations
Making your own cake pops at home lets you try new flavor mixes. You can blend different cake bases, frostings, and coatings. This way, you can create unique treats that match Starbucks’.
| Flavor | Cake Base | Frosting | Coating |
|---|---|---|---|
| Chocolate Delight | Chocolate Cake | Chocolate Buttercream | Dark Chocolate |
| Vanilla Dream | White Cake | Vanilla Frosting | White Chocolate |
| Red Velvet Charm | Red Velvet Cake | Cream Cheese | Cream Cheese Drizzle |
Pro tip: When making your own starbucks cake pops recipe, try unique flavors. Mix lemon poppy seed, mint chocolate, or cinnamon roll for your own special treat.
Troubleshooting Common Issues
Making easy Starbucks cake pops can be tough, even for pros. Knowing common problems helps you get it right every time. This way, you’ll master the starbucks cake pops tutorial.
Here are some common issues you might face:
- Cake balls falling off sticks
- Cracking candy coating
- Uneven cake pop shapes
- Inconsistent dipping technique
Now, let’s look at how to solve these problems:
| Problem | Cause | Solution |
|---|---|---|
| Cake Balls Falling Off | Insufficient chilling | Freeze cake balls for 15 minutes before inserting sticks |
| Cracking Coating | Incorrect temperature | Melt chocolate at 130°F or lower |
| Uneven Shapes | Inconsistent rolling | Use a cookie scoop for uniform size |
Pro tip: Always chill your cake balls for at least 1 hour before dipping. This ensures they stay together and have a smooth coating.
By using these tips, you’ll make Starbucks-style cake pops that look and taste great. They’ll be a hit with anyone who tries them.
Conclusion
Making homemade Starbucks cake pops is more than baking. It’s a chance to save money and get creative. With each batch, you’ll learn to turn simple ingredients into tasty treats that match the best Starbucks ones.
Your baking journey lets you pick flavors, try decorations, and improve your skills. One box of cake mix can make 20-24 cake pops, which is a great deal. The secret is patience and practice, focusing on how you do things and the quality of your ingredients.
We encourage you to share your cake pop creations with others. Try new flavors, decorations, and make each batch special. Your homemade Starbucks cake pops show off your cooking talent and creativity.
Begin your cake pop adventure today. With time, you’ll make treats that wow your family and friends. Enjoy baking!
FAQ
How long do homemade Starbucks-style cake pops typically last?
Homemade cake pops can last 3-4 days at room temperature. They can stay fresh up to a week in the fridge. And up to 2 months in the freezer. Always keep them in an airtight container to keep them fresh.
Can I make cake pops without a specialized cake pop molder?
Yes, you can make cake pops without a molder. Bake the cake in a standard pan, then crumble it. Form the cake into balls by hand. A molder helps with shape, but it’s not necessary for tasty cake pops.
What’s the best type of frosting to use for cake pop binding?
Buttercream frosting is the best for binding cake crumbs. It gives the right texture and keeps the shape. Use 1/4 to 1/3 cup of frosting for every cup of cake crumbs.
How can I prevent my cake pops from falling off the stick?
Chill your cake balls before adding sticks. Dip the stick’s tip in melted candy coating. This helps them stick. Also, make sure your cake isn’t too moist to avoid heavy pops.
What are some popular Starbucks cake pop flavor variations I can try?
Try Birthday Cake (vanilla cake with vanilla frosting), Chocolate (chocolate cake with chocolate frosting), and seasonal flavors like Pumpkin Spice or Red Velvet. Mix different cakes and frostings to create unique flavors.
Can I make cake pops gluten-free or vegan?
Yes! Use gluten-free cake mix and replace regular ingredients with gluten-free ones. For vegan pops, use plant-based cake mix, vegan frosting, and dairy-free candy melts. The basic steps are the same, allowing for dietary changes.
How do I get a smooth candy coating on my cake pops?
Make sure your candy melts are melted and smooth, at 90-95°F. If it’s too thick, thin it with vegetable oil. Dip quickly and tap off excess for a smooth finish.
What’s the most common mistake when making cake pops?
Over-mixing the cake and frosting is a big mistake. It can make the mixture too wet or dense. Mix just until combined for the best texture.
How can I make my cake pops look more professional?
Practice dipping techniques and use quality candy melts. Try decorations like sprinkles, drizzles, and different colors. Good tools, like a cake pop stand, can also help.
Are cake pops expensive to make at home?
Making cake pops at home is much cheaper than buying them. A batch of 24 might cost $10-$15. This is a lot cheaper than $2-$3 per pop at Starbucks.
Starbucks Cake Pops: A Tasty Copycat Recipe
Ever wanted to enjoy Starbucks cake pops but thought they were too pricey? You’re not alone. Making your own Starbucks cake pops at home is easy and saves money.
These treats have won over many dessert fans. Our recipe lets you make these tasty bites in your kitchen. You’ll save up to 70% and enjoy cake pops just how you like them.
Perfect for birthdays, casual gatherings, or just treating yourself, homemade Starbucks cake pops are ideal. This guide will show you how to make these treats. You’ll get professional-looking results that match the coffee chain’s famous dessert.
Ready to wow your loved ones with delicious, affordable cake pops? Your baking journey begins today!
Why These Homemade Starbucks Cake Pops Are Perfect
Making easy Starbucks cake pops at home turns a simple dessert into a special treat. These treats are great for home bakers and dessert lovers. They offer many benefits.
Cost-Effective Alternative
Creating the best Starbucks cake pops at home saves you a lot of money. Here are some financial perks:
- Retail price at Starbucks: Over $2 per cake pop
- Homemade cost: Approximately $0.50 per pop
- One batch yields 24-28 cake pops
With a little time and effort, you can make a batch of tasty cake pops for much less than the coffee shop price.
Customizable Options
Homemade cake pops let you be creative. You can try:
- Flavor combinations
- Color schemes
- Decorative designs
- Seasonal themes
Your kitchen becomes a playground for culinary imagination!
Perfect for Special Occasions
Homemade cake pops are great for any special event. They’re perfect for birthdays, baby showers, or holidays. They’re easy to carry, cute, and can fit any event’s theme.
| Occasion | Suggested Decoration |
|---|---|
| Birthday | Colorful sprinkles |
| Wedding | Elegant white coating |
| Holiday | Themed candy melts |
With these easy Starbucks cake pops, you’ll make desserts that everyone will love. And you’ll save money too.
Essential Ingredients for Starbucks Cake Pops Recipe
To make delicious Starbucks-style cake pops at home, start by gathering the right ingredients. Your homemade recipe will need a few key items for top-notch results.
Here are the main ingredients for your cake pop journey:
- Cake Mix: 1 box of white cake mix (about 15.25 oz)
- Frosting: ½ cup of vanilla frosting
- Candy Melts: 12 ounces of white or colored coating
- Lollipop Sticks: 48 standard-sized sticks
- Additional Flavor Enhancers: Vanilla extract, almond extract
When picking ingredients for your starbucks cake pops recipe, quality is crucial. Go for a trusted cake mix brand and choose fresh, creamy frosting. The candy melts will give your cake pops that smooth coating everyone loves.
Pro tip: For the best taste, use whole milk and add a bit of vanilla extract to your cake mix. This small addition can make your homemade cake pops truly irresistible.
| Ingredient | Quantity | Purpose |
|---|---|---|
| White Cake Mix | 1 box | Base for cake pops |
| Vanilla Frosting | 4 tablespoons | Binding agent |
| Candy Melts | 16 ounces | Coating |
Remember, precision is key when gathering your starbucks cake pops ingredients. Measure carefully and get ready to make a treat that’s just as good as the coffee shop version!
Required Tools and Equipment
To make delicious Starbucks cake pops at home, you need certain tools. This guide will show you what you need to make these tasty treats like a pro.
Baking Essentials
For baking Starbucks cake pops, you’ll need some basic tools:
- 9×13 inch baking pan
- Large mixing bowls
- Electric mixer or whisk
- Measuring cups and spoons
- Cooling rack
Decorating Tools
To decorate your cake pops like Starbucks, you’ll need:
- Cake pop sticks (6-inch recommended)
- Styrofoam block for drying
- Candy melting wafers
- Piping bags
- Offset spatula
Storage Equipment
Keeping your cake pops fresh is important:
| Storage Method | Duration | Recommended Container |
|---|---|---|
| Refrigerator | Up to 5 days | Airtight container |
| Freezer | Up to 1 month | Sealed plastic bag |
Pro tip: Good tools make baking easier and more fun. With the right tools, your cake pops will look like they came from Starbucks.
Step-by-Step Preparation Guide
Making Starbucks-style cake pops at home is simple. This guide will show you how to make these tasty treats with ease.
- Bake the Cake Base First, preheat your oven to 350°F. Mix 1 cup all-purpose flour, 1 cup granulated sugar, and 6 tablespoons cocoa powder. Bake for 25-28 minutes until a toothpick comes out clean.
- Crumble and Mix After the cake cools, crumble it finely. Add 1/2 cup buttercream frosting and mix until it forms balls. Use a cookie scoop for even sizes.
- Form Cake Balls Roll the mix into 1-1/2 inch balls. You should get 24-25 balls. Place them on a parchment-lined baking sheet.
- Chill and Prepare Refrigerate the balls for 20-30 minutes. This makes them firm for dipping. Freezing them for an hour helps too.
- Dip and Decorate Melt candy coating or white chocolate. Dip cake pop sticks halfway and then into the cake balls. Coat each pop fully and decorate with sprinkles or drizzle.
“The secret to perfect starbucks cake pops is patience and precision in each step.” – Baking Enthusiast
By following these steps, you can make professional-looking cake pops at home. Each homemade pop costs about $0.35, saving you 91% compared to Starbucks’ $3.75 price.
Mastering the Perfect Cake Base
Making the best Starbucks cake pops at home starts with a great cake base. You need the right texture and moisture. A perfectly baked cake is key. It should crumble easily and stick well with frosting.
Perfecting Your Baking Temperature
Temperature control is crucial when making homemade Starbucks cake pops. Bake your cake at 325°F (175°C) for the best results. This temperature ensures even cooking and keeps the cake moist.
Your cake will bake for 23-28 minutes. Make sure to check it often to avoid overcooking.
- Use an oven thermometer to verify accurate temperature
- Place cake in the center rack for consistent heat distribution
- Avoid opening the oven door frequently during baking
Moisture Control Techniques
For the best Starbucks cake pops, you need to control moisture. Add 1 cup of water and ⅓ cup of coconut oil to your mix. These ingredients make the cake moist but not soggy.
The Cooling Process
Cooling your cake properly is vital. Let it cool completely at room temperature for about 15 minutes. This step helps prevent moisture buildup and makes crumbling easier.
Pro Tip: A perfectly cooled cake is the foundation of delicious homemade Starbucks cake pops!
Creating the Ideal Cake Pop Mixture
Making the perfect starbucks cake pops recipe is all about finding the right mix of cake and frosting. Your easy starbucks cake pops need a mix that’s just right. It should stick together well but not be too dry or too wet.
Here are the main tips for making your cake pop mix:
- Use a 3:1 cake to frosting ratio
- Crumble cake completely into fine crumbs
- Add frosting gradually
- Mix until the texture is similar to play-dough
The mix’s texture is key for great cake pops. Too much frosting makes them too soft, and too little causes them to crumble. You should be able to press the mix together without it being sticky.
| Mixture Component | Recommended Quantity |
|---|---|
| Crumbled Cake | 3 cups |
| Frosting | 1 cup |
| Ideal Mixture Weight | 27-30 grams per cake pop |
Pro tip: If your mix feels dry, add frosting a little at a time. If it’s too wet, add more cake crumbs to get it just right.
Dipping and Coating Techniques
Learning to dip and coat is key in your Starbucks cake pops tutorial. The right method can make your homemade treats look like they were made by a pro.
When you follow a step-by-step guide, controlling the temperature is crucial. Candy melts should be heated to 100-110°F. This temperature makes the coating smooth and perfect for covering your cake balls.
Coating Consistency Secrets
Getting the coating just right takes focus. Here are some tips for a pro finish:
- Use high-quality candy melts for the best results
- Thin out thick candy melts with vegetable shortening
- Gently tap off excess coating to prevent dripping
- Work quickly to prevent the coating from hardening
Dipping Techniques
Professional cake pop makers know technique is everything. Dip your cake pop stick into melted candy coating before inserting it into the cake ball. This makes sure it stays on during the coating process.
When dipping, dip the cake pop at a 45-degree angle and lift straight up. Rotate the pop to let excess coating drip off. Let each cake pop set for about 1 hour before decorating.
Pro tip: Keep your candy melts warm using a heating pad or double boiler to maintain optimal coating consistency.
Decorating Ideas and Variations
Turning your homemade Starbucks cake pops into stunning treats is an art. It lets you explore a world of colors, textures, and flavors. You can make them just as good as the ones from the coffee shop.
When making starbucks cake pops flavors, try these exciting decoration techniques:
- Classic Drizzle Patterns: Create elegant lines using melted chocolate in contrasting colors
- Sprinkle Varieties: Use themed or seasonal sprinkles for festive touches
- Color-Blocking: Experiment with multiple candy coating colors
- Metallic Accents: Add edible gold or silver dust for glamorous finishes
Your homemade Starbucks cake pops can have amazing flavor variations. Popular options include:
- Red Velvet with Cream Cheese Coating
- Chocolate Brownie with Dark Chocolate Drizzle
- Lemon Cake with White Chocolate Glaze
- Vanilla Bean with Pastel Pink Coating
Remember, temperature control is key when decorating. Make sure your chocolate coating is smooth and at the right temperature. This way, you’ll make cake pops that taste great and look like they were made by a pro.
Pro Tip: Chill your cake balls for 30 minutes before dipping to ensure a smooth, even coating.
Storage and Shelf Life
Making the best Starbucks cake pops at home is just the start. Learning how to store them right keeps them fresh and tasty longer. Storing them well is key to keeping their quality and flavor.
There are different ways to store your homemade cake pops. Each method has its own tips:
Room Temperature Storage
Cake pops can stay fresh for up to a week at room temperature. Store them in an airtight container, away from sunlight and heat. Use paper towels between layers to avoid moisture.
Refrigeration Guidelines
Refrigeration can make your cake pops last longer. Here’s how to do it right:
- Use a glass container to avoid flavor absorption
- Keep them on a cool, consistent shelf in the fridge
- They can stay fresh for up to two weeks
Freezing Instructions
Freezing is the best way to keep your cake pops fresh for a long time:
| Freezing Method | Duration | Preparation |
|---|---|---|
| Standard Freezing | Up to 1 month | Wrap individually in wax paper |
| Airtight Container | Up to 1 month | Use sealed freezer bag |
Pro tip: Wrap each cake pop separately to avoid freezer burn. Store them in an airtight container.
Popular Flavor Combinations
Exploring starbucks cake pops flavors opens a world of sweet delights. Each flavor is a unique and memorable mix that makes every bite special.
Here are some irresistible starbucks cake pops recipe favorites:
- Classic Chocolate: A rich, decadent option loved by chocolate enthusiasts
- Birthday Cake: Festive pastel pink with sprinkle decorations
- Red Velvet: Smooth, velvety texture with cream cheese undertones
- Seasonal Specials: Peppermint and pumpkin spice variations
Making your own cake pops at home lets you try new flavor mixes. You can blend different cake bases, frostings, and coatings. This way, you can create unique treats that match Starbucks’.
| Flavor | Cake Base | Frosting | Coating |
|---|---|---|---|
| Chocolate Delight | Chocolate Cake | Chocolate Buttercream | Dark Chocolate |
| Vanilla Dream | White Cake | Vanilla Frosting | White Chocolate |
| Red Velvet Charm | Red Velvet Cake | Cream Cheese | Cream Cheese Drizzle |
Pro tip: When making your own starbucks cake pops recipe, try unique flavors. Mix lemon poppy seed, mint chocolate, or cinnamon roll for your own special treat.
Troubleshooting Common Issues
Making easy Starbucks cake pops can be tough, even for pros. Knowing common problems helps you get it right every time. This way, you’ll master the starbucks cake pops tutorial.
Here are some common issues you might face:
- Cake balls falling off sticks
- Cracking candy coating
- Uneven cake pop shapes
- Inconsistent dipping technique
Now, let’s look at how to solve these problems:
| Problem | Cause | Solution |
|---|---|---|
| Cake Balls Falling Off | Insufficient chilling | Freeze cake balls for 15 minutes before inserting sticks |
| Cracking Coating | Incorrect temperature | Melt chocolate at 130°F or lower |
| Uneven Shapes | Inconsistent rolling | Use a cookie scoop for uniform size |
Pro tip: Always chill your cake balls for at least 1 hour before dipping. This ensures they stay together and have a smooth coating.
By using these tips, you’ll make Starbucks-style cake pops that look and taste great. They’ll be a hit with anyone who tries them.
Conclusion
Making homemade Starbucks cake pops is more than baking. It’s a chance to save money and get creative. With each batch, you’ll learn to turn simple ingredients into tasty treats that match the best Starbucks ones.
Your baking journey lets you pick flavors, try decorations, and improve your skills. One box of cake mix can make 20-24 cake pops, which is a great deal. The secret is patience and practice, focusing on how you do things and the quality of your ingredients.
We encourage you to share your cake pop creations with others. Try new flavors, decorations, and make each batch special. Your homemade Starbucks cake pops show off your cooking talent and creativity.
Begin your cake pop adventure today. With time, you’ll make treats that wow your family and friends. Enjoy baking!
FAQ
How long do homemade Starbucks-style cake pops typically last?
Homemade cake pops can last 3-4 days at room temperature. They can stay fresh up to a week in the fridge. And up to 2 months in the freezer. Always keep them in an airtight container to keep them fresh.
Can I make cake pops without a specialized cake pop molder?
Yes, you can make cake pops without a molder. Bake the cake in a standard pan, then crumble it. Form the cake into balls by hand. A molder helps with shape, but it’s not necessary for tasty cake pops.
What’s the best type of frosting to use for cake pop binding?
Buttercream frosting is the best for binding cake crumbs. It gives the right texture and keeps the shape. Use 1/4 to 1/3 cup of frosting for every cup of cake crumbs.
How can I prevent my cake pops from falling off the stick?
Chill your cake balls before adding sticks. Dip the stick’s tip in melted candy coating. This helps them stick. Also, make sure your cake isn’t too moist to avoid heavy pops.
What are some popular Starbucks cake pop flavor variations I can try?
Try Birthday Cake (vanilla cake with vanilla frosting), Chocolate (chocolate cake with chocolate frosting), and seasonal flavors like Pumpkin Spice or Red Velvet. Mix different cakes and frostings to create unique flavors.
Can I make cake pops gluten-free or vegan?
Yes! Use gluten-free cake mix and replace regular ingredients with gluten-free ones. For vegan pops, use plant-based cake mix, vegan frosting, and dairy-free candy melts. The basic steps are the same, allowing for dietary changes.
How do I get a smooth candy coating on my cake pops?
Make sure your candy melts are melted and smooth, at 90-95°F. If it’s too thick, thin it with vegetable oil. Dip quickly and tap off excess for a smooth finish.
What’s the most common mistake when making cake pops?
Over-mixing the cake and frosting is a big mistake. It can make the mixture too wet or dense. Mix just until combined for the best texture.
How can I make my cake pops look more professional?
Practice dipping techniques and use quality candy melts. Try decorations like sprinkles, drizzles, and different colors. Good tools, like a cake pop stand, can also help.
Are cake pops expensive to make at home?
Making cake pops at home is much cheaper than buying them. A batch of 24 might cost $10-$15. This is a lot cheaper than $2-$3 per pop at Starbucks.